Famous Cannons
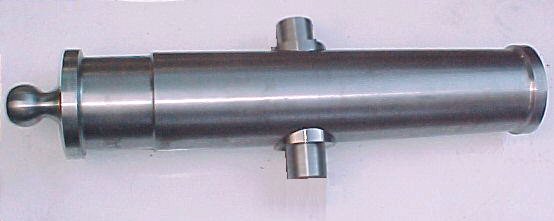
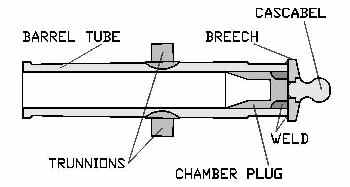
The mt howitzer barrel I designed consisted of 6 pieces. The "Cascabel" ( the ball at the back of the cannon barrel - Spanish for "coiled snake" ) The "Breech Plate" ( the plate at the back of the tube which holds the cascabel ) The "Chamber Plug" ( the plug in the rear end of the tube ) The "Trunnions" ( the 2 support pivots near the center of the barrel ) and the "Tube" itself. As you can see, when the separate pieces are assembled, they complete the mt howitzer barrel.
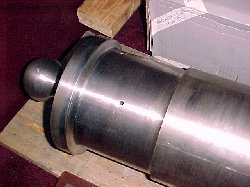
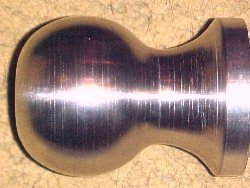
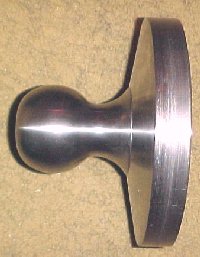
The Cascabel started out as a purchased, solid, high strength 3" diameter, trailer hitch ball. This is the kind of ball that is used on fifth-wheel trailer hitches. Although it cost about $50, a lot of machining time was saved. The ball was finish shaped on a lathe, and then cut to length. The Breech Plate was made from a 1-1/2" thick slice of 8" diameter 1018 HR bar. Cost was about $20. It was lathe turned and bored through to receive the Cascabel. The Cascabel was pressed into the Breech Plate and then plug welded in place.
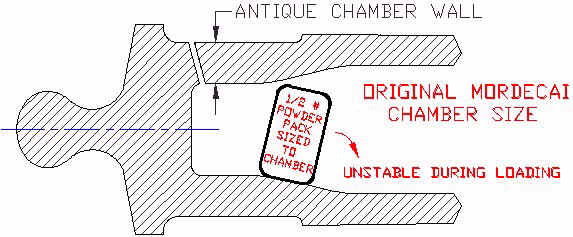
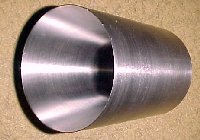
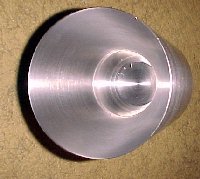
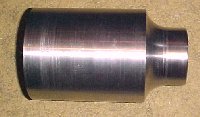
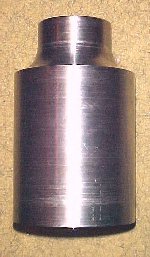
The next item to be fabricated was the Chamber Plug. It was machined from a piece of 1018 HR bar, 4-3/4" dia. by 8" long and cost $25. The plug's inside ( Chamber ) shape accepts the powder charge. The name "howitzer" in a Mountain Howitzer cannon, defines that it will have a reduced chamber diameter that gradually tapers to the full bore diameter. Originally, in the 1850s, this chamber size was matched exactly to the volume of 1/2 pound of black powder and measured 3-3/8" dia. by 2-3/4" long.
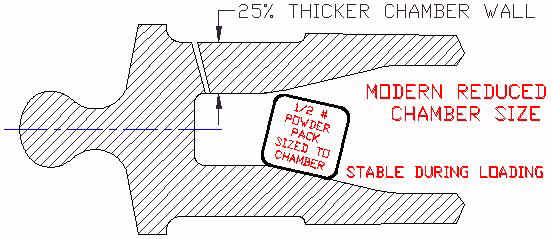
Note: The inside Chamber size of this barrel was reduced from the original 1850's size of 3.40" diameter, to a smaller 2.61" diameter. This smaller dia. size takes into account that our modern powder charges are not going to be wrapped in a bulky flannel or cotton bag like the original 1850's powder charges were. Also, this reduced Chamber size resulted in a 25% increase in wall thickness in this area of the howitzer barrel. This added a modern safety factor to our modern howitzer barrel; and made for easier loading of the powder charge. Compare the difference in the illustrations below.
The outside dia. of the Chamber Plug was left .030" oversize for now. A tight, slide fit, matching the I.D. of the barrel tube, would be machined later. The deep curved relief at the back of the plug was designed for the 1 inch x 2 inch "J-weld" that would be used to weld the plug into the back of the barrel.
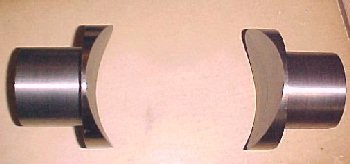
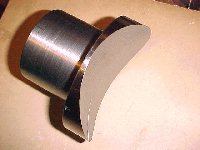
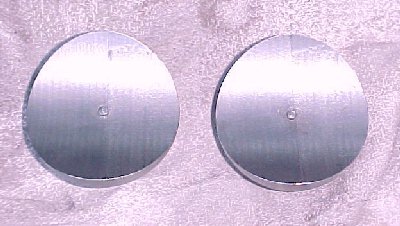
The Trunnions were lathe turned as a single piece also using 1018 HR bar. Cost was $25. The ends were stepped to correspond to the finished dimensions of the individual trunnions. Once completed, the center section was milled out to the O.D. of the barrel diameter at the trunnion mounting location. When the center material was milled away, 2 perfectly contoured Trunnions remained.
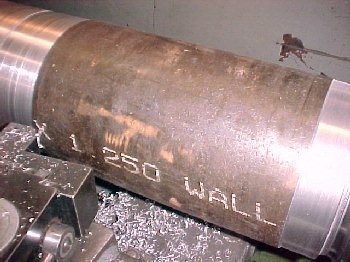
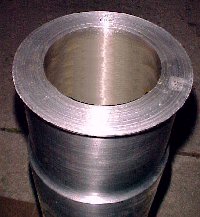
The final piece of the barrel assembly was the Barrel Tube itself. It consisted of a 33-1/8" long piece of 1026 HR "Seamless" steel Tube, 7" O.D. with 1-1/4" wall. ( nominal 4-1/2" I.D. ) It was special ordered and cost less than $300. The two important specifications of this material are "Seamless" and "Hot Rolled". ( or "Hot Formed" ) Specification of this material is as follows:
Tensile Strength, psi = 70,000 - Yield Strength, psi = 47,000 - Elongation, % in 2" = 28
These specs are significantly higher (2 times) than original 1850's Mountain Howitzer specs.
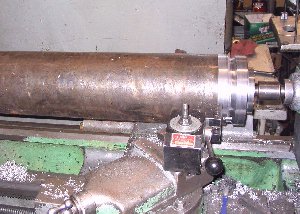
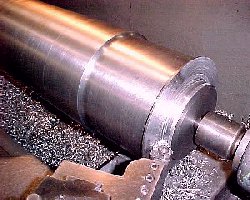
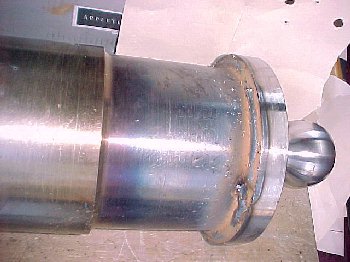
Most fortunate for me, was a friend offering the use of his large metal lathe for my Mountain Howitzer cannon project. The lathe was a 1940's vintage LaBlond that saw much use during WWII. It easily accepted the large barrel tube which weighed in at 175 pounds. One end of the tube was supported in a 3-jaw chuck, while the other end had a pressed-in temporary plug ( $15 ) for use with a live center. The muzzle end was machined first, then the Mt. Howitzer tube was turned end-for-end to machine the breech. The taper was machined by using a very slow power feed, synchronized with a "wrist watch timed" manual cross-feed.
When the outside machining was finished, the surface was flat-filed and sanded and then polished smooth. At this point, the tube was sent to a local machine shop to have the inside diameter bored-through the full 33" length. ( Unfortunately this boring operation was beyond the capability of the equipment I was using. ) Specifications for the bore-through was "minimum clean-up" to a maximum I.D. of 4.60 inches, with a closely held "tight tolerance" for the first 7-1/2" depth at the breech end that matched the Chamber Plug diameter and length specs. Cost for this machining was a very reasonable $150.
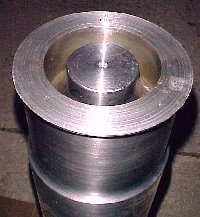
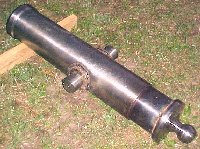
When the 6 individual pieces of the Mt. Howitzer barrel were placed together, they looked like this.
After the boring of the Barrel tube was completed, I machined the final O.D. of the Chamber Plug to provide a matching "tight-slide-fit" into the finished breech end of the tube. This end of the tube was also machined leaving a small .030" shoulder at a depth of 7-1/2" to match the length of the Chamber Plug. This step ensured proper location of the plug for welding.
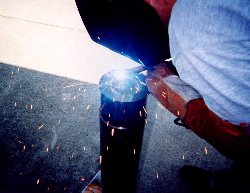
With all the barrel parts completed, they were taken to an "Expert Welder" in our area. Since quality welding is the most critical factor in fabricating a barrel, I wanted to be sure I had a "certified" welder doing the job. In fact, the welder I chose was also certified for "pressure vessel" welding. As an added precaution, I contacted a Welding Engineer ( from the Society of Professional Welding Engineers ) to review and evaluate the intended welding process.
The barrel welding operation is not a "do it yourself" project. For safety sake, hire a professional!
Three important factors came into play in welding. First, the preheating of the mating parts prior to welding. ( barrel and plug were preheated to 600 degrees Fahrenheit ) Second, the use of proper "welding wire" material to match the materials being welded. ( series 70 wire was used ) Third, the "slow cooling" of the barrel after welding. ( barrel was slow cooled, in still air, over a 6 hour period)
Over 5 pounds of weld was used to "J-weld" the Chamber Plug in place.
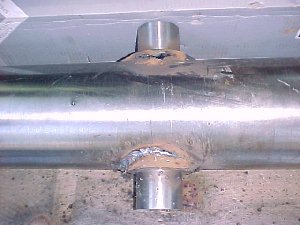
Next, the Breech Plate ( with its pre-welded Cascabel ) was welded over the Chamber Plug with a "deep penetrating" continuous 3/8" weld.
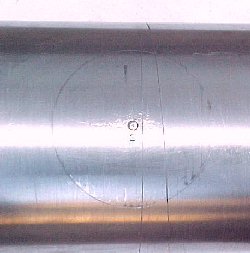
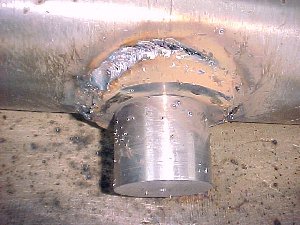
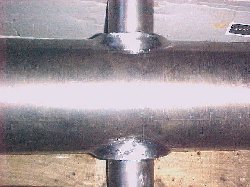
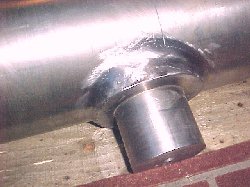
Prior to welding the Trunnions, their locations were precisely measured and scribed onto the sides of the barrel. Shallow 1/4" diameter blind-holes were drilled ( 1/8" deep ) into the barrel at each location. A corresponding 1/4" diameter stud was pressed into the inside center of each Trunnion. Each trunnion was final fitted and number stamped. Matching numbers were stamped onto the barrel to prevent any mix-up prior to their being welded. ( Precisely aligned trunnions are necessary for accurate shooting of the completed mountain howitzer cannon.)
The Trunnion locating studs prevented shifting of position during welding. A deep undercut "bevel" was ground onto the Trunnion flanges prior to their being welded. As the Trunnions were welded, a large radius weld was filleted up onto the barrel. Over 12 linear inches of weld secured each trunnion to the barrel tube. Too much weld here is better than too little, although cleaning-up the excess weld proved to be a very time-consuming task.
The total welding time for all the barrel pieces was about 4 hours at a reasonable cost of $200.
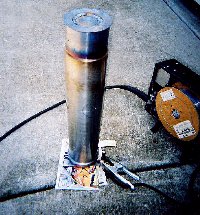
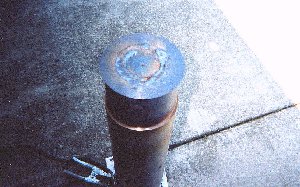
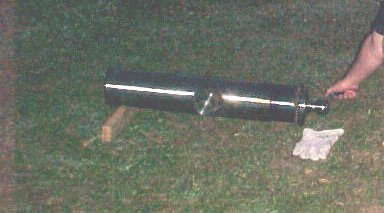
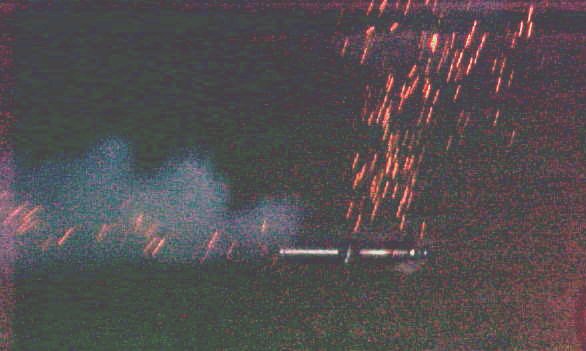
It was now time to test fire the barrel. An undersize 3/16" dia. fuse hole was drilled through the top of the barrel at a precise location angling 1/2" forward of the rear of the Chamber. The first shot honors went to my son-in-law for his birthday present. A standard load of 1/2 pound black powder was used for the evening shot. The fuse was lit and 20 seconds later the BIG BANG told us we had a completed Mountain Howitzer cannon barrel.
Now for the hand finishing.
An air powered die grinder with a small cut-off wheel was used for most of the weld clean-up task. After dozens of hours of grinding, filing, and polishing, the Mountain Howitzer barrel was finished. Last item to do was to enlarge the Fuse hole to the proper .200 diameter.
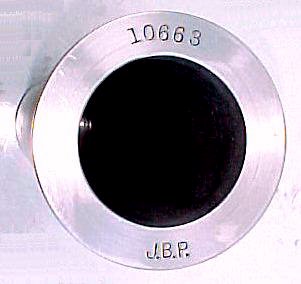
Now that my mountain howitzer barrel was completed, I added details to make it look authentic. Original Civil War Mountain Howitzer barrels had a serial number stamped to the top front face of the barrel. There I stamped serial number "10663". Original Mountain Howitzer barrels were inspected and the inspector marked his initials along the bottom front face of the barrel. There I stamped "J.B.P".
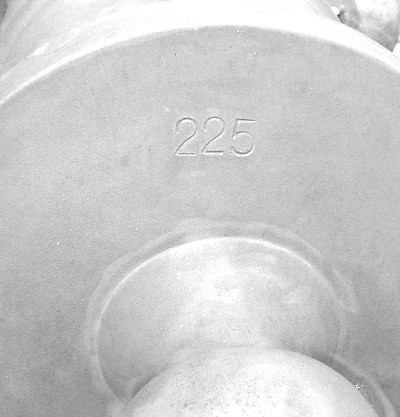
On the rear Breech plate, above the cascabel ( sometimes below ) original howitzer tubes were stamped with the exact weight of the barrel. There I stamped "225".
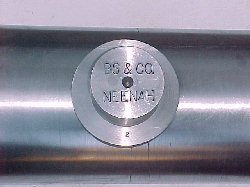
The right Trunnion face on an original barrel was typically stamped with the Company name and the city of manufacture. There I stamped "BS & CO." and "NEENAH".
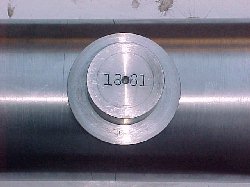
And, original barrels had the left Trunnion face stamped with the year of manufacture. There I stamped "1861".
So, how did I come up with all the numbers for my mountain howitzer barrel? The serial number "10663" stands for a date, 10/6/1863. That was the date of the battle when 1st Lt. James Burton Pond won the Medal of Honor using a Mountain Howitzer. (also 106 days to complete this project in June, [6] of 2003) The Inspector initials stamped, "J.B.P." stand for James Burton Pond.
The manufacturer, "BS & CO." stands for me, "BS" for Buck Stix, and the "& CO." for all the people who helped me with this project. In addition, the "BS" also stands for the city, Baxter Springs, Kansas, where the Historic battle against Quantrill's Raiders took place.
The Trunnion date I used, "1861" is the year that J.B. Pond enlisted and organized the 3rd Wisconsin Cavalry, Company C.
The only real number with no hidden meaning is the "225", which is the actual weight of my finished barrel. I wanted my barrel to "look" authentic, but I didn't want to fool anyone into thinking it was a genuine Antique so I improvised. ( As a side note, original documented Mountain Howitzer barrels weighed between 217 and 230 pounds. This barrel weighed 225 pounds, right in the ballpark. )